As we move through 2021, the “Gold Standard” RT-PCR test is facing a major bottleneck. With diagnostic laboratories overwhelmed and the delta variant causing a surge in cases, the wait times for results—sometimes 48 to 72 hours—have made “rapid” testing a necessity rather than a luxury.
To combat this, government agencies like the FDA and ICMR have turned to a potential game-changer: Self-Diagnostic Testing Kits. These at-home kits empower you to bypass crowded testing centers and get answers in minutes, providing a critical tool for early isolation and community protection.
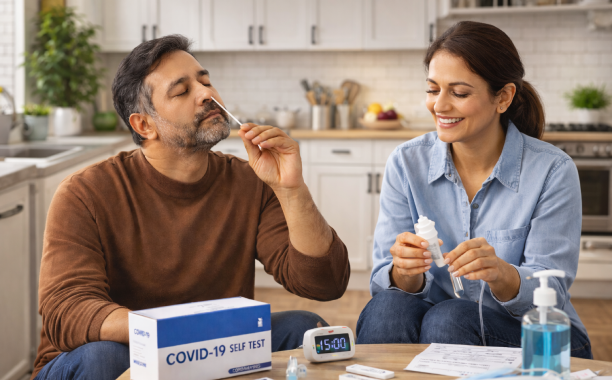
Popular Self-Testing Kits in the Market
The technology behind these kits varies from molecular amplification to rapid antigen detection. Here is a breakdown of the leaders in the field:
1. Lucira COVID-19 All-In-One Test
This is a high-tech, molecular single-use kit. Unlike standard antigen tests, it uses targeted molecular amplification (similar to PCR) making it reactive to over 99.9% of viral sequences.
- Time: 30 minutes.
- Result: A light-up display on the unit indicates status.
- Best for: Individuals aged 14+ seeking high accuracy at home.
2. Ellume COVID-19 Home Test
Ellume offers a Bluetooth-connected analyzer that syncs with your smartphone. It is a rapid antigen test that detects viral proteins.
- Accuracy: 95% sensitivity in clinical studies.
- Feature: Results are automatically transmitted to health authorities via the app, aiding in national case mapping.
3. CoviSelf (India’s First)
Developed by MyLab Discovery Solutions, this is India’s first ICMR-approved kit. It is designed for ease of use and affordability (priced at just Rs. 250/-).
- Process: A simple nasal swab mixed with extraction fluid is dropped onto a testing card.
- Interpretation: Two lines on the ‘T’ and ‘C’ marks indicate a positive result; one line on ‘C’ indicates negative.
How to Use a Self-Test Kit Correctly
While each kit differs, the general procedure follows these steps:
- Preparation: Wash hands and disinfect the surface.
- Swabbing: Insert the sterile swab into the nasal tract (usually 2-4 cm deep) and swirl.
- Extraction: Stir the swab into the pre-filled buffer tube to release the viral material.
- Testing: Add the specified number of drops to the testing card.
- Reporting: Use the brand’s mobile app to scan the result and upload it to government portals (like the ICMR portal in India).
The Limitations: What You Need to Know
While convenient, self-testing is not foolproof. In 2021, medical experts are highlighting four primary challenges:
- Sensitivity Issues: Rapid antigen tests are less sensitive than PCR. They require a higher viral load to trigger a positive result. This means you might be “negative” during the early incubation period but still be carrying the virus.
- Inaccuracy (False Negatives): These kits are essentially “infectiousness tests.” If you have symptoms but test negative, medical guidelines still require a confirmatory RT-PCR test.
- Risk of Contamination: Without a trained professional, there is a risk of improper sampling (not swabbing deep enough) or improper disposal of the biohazardous kit.
- Genome Manipulation: As we saw in the second wave, some mutations can occasionally evade detection in certain tests. Kits like Covi Direct are currently being developed to specifically target multiple variants.
The Verdict: A Vital Support Tool
In 2021, the self-testing kit is a fundamental pillar of national containment strategies. By cutting laboratory queues and allowing for immediate isolation, these kits reduce the “cascading effect” of community transmission.
Reliability remains a concern, but as a first line of defense during a surge, the at-home kit is an indispensable ally in our fight to return to normalcy.